How To Mix Your Own E-Liquid: The Complete UK DIY Guide

This guide gives you the full method for how to mix your own e-liquid, so the real takeaway is simple: get your VG/PG ratio, flavour percentage and nicotine dosed in the right order, then let it steep before you judge it. We cover the ingredients, kit, and UK nicotine rules you need, plus exact ratios for sub-ohm, MTL and bakery-style mixes. Follow the step-by-step process and you will land a batch that vapes like a bought bottle, not a bin job.
What You Need To Mix Your Own E-Liquid
Four things make up every DIY mix: VG, PG, flavour concentrates, and (if you want it) nicotine. Everything else is measuring and patience. Get the ingredients and a bit of kit sorted before you touch a bottle, because mixing on the fly is how you end up with a batch you have to bin.
Ingredients: VG, PG, flavour concentrates & nicotine
Your base is vegetable glycerine (VG) and propylene glycol (PG). VG is the thick stuff that carries vapour and sweetness; PG is thinner, carries flavour and throat hit. The split you choose drives how the finished mix behaves in your kit, and we go deep on that in Understanding VG & PG in E-Liquid.
- VG - dense vapour, slightly sweet, thick to work with
- PG - thin, sharpens flavour, adds throat hit
- Flavour concentrates - highly concentrated, used at roughly 10-20% depending on the flavour
- Nicotine shots - optional, added last to hit your target strength
On nicotine, the UK rules are firm. Nicotine shots sold here are capped at 20mg/ml and come in 10ml bottles under the TRPR. A standard shot is a 10ml, 18mg or 20mg, 70/30 or 50/50 unflavoured nic base. You do the maths on how many shots your batch needs to land at your target strength.
Equipment checklist
You do not need a lab. A handful of cheap, reusable bits covers you for years of mixing.
Ingredients
- ✅ VG (1 litre) - around £8-£12
- ✅ PG (1 litre) - around £8-£12
- ✅ Flavour concentrates (10-30ml) - around £3-£5 each
- ✅ Nicotine shots (10ml, capped at 20mg/ml) - around £1 each
That litre of base makes a lot of e-liquid, so the per-batch cost drops fast once you are set up.
Equipment
- ✅ Measuring syringes or a set of measuring bottles
- ✅ Empty bottles (chubby gorillas or dropper bottles)
- ✅ Nitrile gloves
- ✅ Labels for strength, ratio and mix date
- ✅ Kitchen roll for the inevitable spills
Total kit outlay is small and most of it lasts indefinitely. Label everything, because an unlabelled bottle of nicotine base is a genuine hazard.
Freebase vs nic salt bases
Choose your nicotine type before you mix, because it dictates the kit you can vape it in. This is the bit switchers most often get wrong.
- Freebase nicotine suits sub-ohm and DTL setups. It gives a firmer throat hit and works best at lower strengths (3mg or 6mg) in higher-VG mixes.
- Nic salt suits low-power MTL pods. It is smoother at higher strengths, so you can run 10mg or 20mg without the harshness, which is why pod vapers lean on it.
We run refillable pod kits day to day and sub-ohm tanks in the evenings, so we mix salts and shortfills in roughly equal measure. If you are building for a pod, go salt; if you are building for an evening sub-ohm tank, go freebase. Our full breakdown lives in What Are Nic Salts?.
Ratios & Percentages: Getting The Mix Right
Get the ratio right and everything else falls into place. Three numbers decide how your mix performs: the PG/VG split, the flavour percentage, and the target nicotine strength. Sort those out on paper first and the mixing itself is quick.
Choosing your PG/VG ratio
PG carries flavour and gives throat hit. VG is thicker, produces more vapour and runs sweeter. The ratio you pick should match the device you are filling.
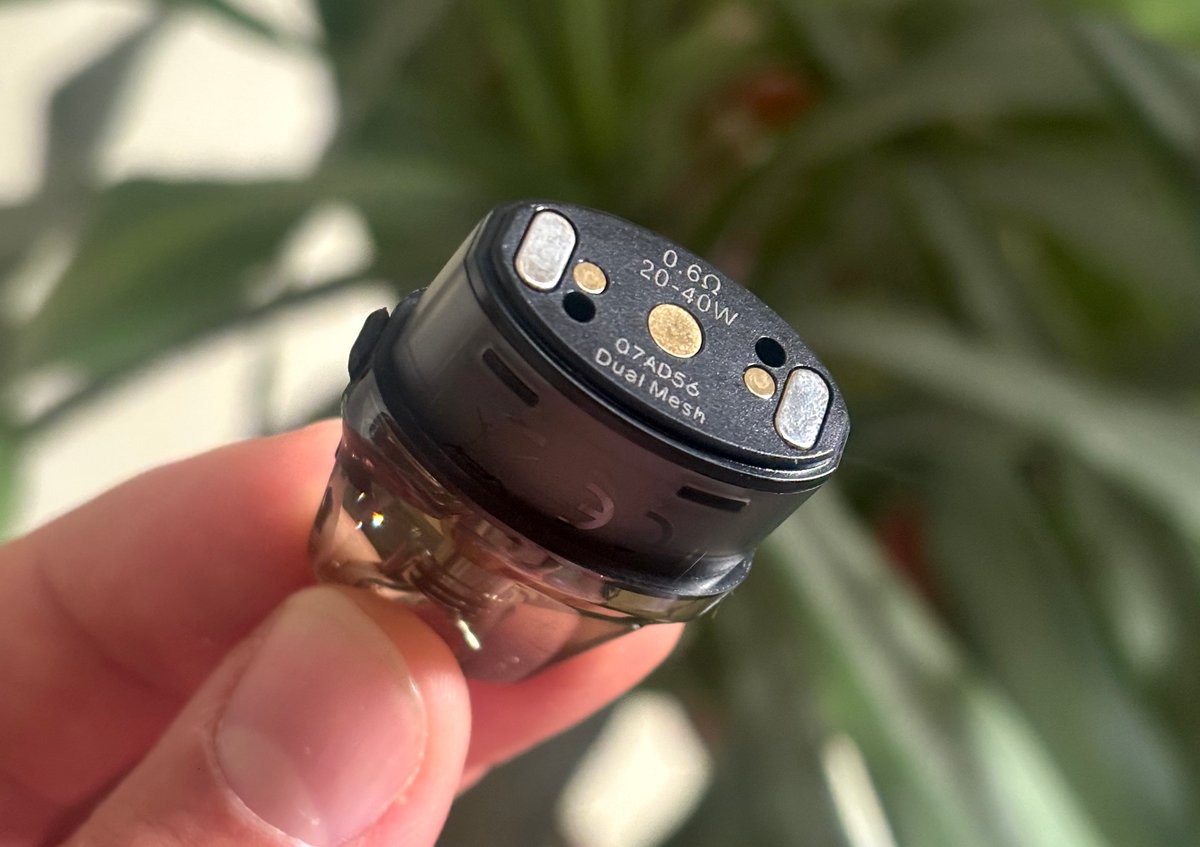
- 70/30 (VG/PG): the standard for sub-ohm tanks and mesh coils under 0.6 ohm. Thicker vapour, smoother throat hit, best on DTL setups in the evening.
- 50/50: the go-to for MTL tanks and refillable pods. Thinner, wicks fast, sharper flavour and a firmer throat hit. This is what most switchers want.
- 60/40 or 65/35: a middle ground if you run one liquid across a pod and a sub-ohm tank.
If you are unsure which coils suit which mix, have a look at How To Match E-Liquid To Your Coil before you commit to a big batch.
Flavour concentration percentages by type
Flavour concentrates are potent, so you use less than you might expect. Most recipes land between 10% and 20% of the total volume.
- Single-flavour recipes: typically 10-15%. One strong concentrate does not need much backup.
- Complex, multi-flavour recipes: typically 15-20%, split across three or four concentrates that each need room to speak.
- Fruits and menthols: tend to sit at the lower end.
- Custards, tobaccos and bakery blends: usually want a touch more and reward longer steeping.
Start at the lower end of the recommended range for each concentrate. You can always add a drop more next batch, but you cannot pull flavour back out once it is in.
A mixing calculator does the sums for you. Punch in your bottle size, target PG/VG ratio, target nicotine strength and flavour percentage, and it converts the lot into ml of each ingredient. Every serious DIY mixer we know uses one rather than working it out by hand.
Sub-ohm / DTL
70/30 VG/PG Flavour: 10-15% Example: 100ml batch, 70ml VG, PG carrying 12% concentrate, no nic or a low 3mg.
MTL / Pods
50/50 Flavour: 12-18% Example: 30ml batch, even PG/VG split, 15% concentrate, salt or freebase nic to taste.
Custard / Bakery
60/40 or 70/30 Flavour: 15-20% Example: richer concentrate load, longer steep, best in an airy MTL or restricted DTL tank.
Adding nicotine shots
Most UK DIY mixing uses unflavoured 18mg or 20mg nicotine shots to bring a nic-free base up to strength. Under the TRPR, nicotine e-liquid sold in the UK is capped at 20mg/ml and shots come in 10ml bottles, so you build strength by adding shots to a larger nic-free shortfill.
The maths is straightforward once you see it in action:
- Two 10ml 18mg shots into a 50ml shortfill gives you 70ml total at roughly 3mg.
- One 10ml 18mg shot into the same 50ml shortfill gives you 60ml at roughly 3mg as well, just less liquid.
- Add the shot, cap the bottle, then shake hard for a minute to blend it through evenly.
Work out your target strength before you buy anything. Our full breakdown in How To Choose The Right E-Liquid Strength covers what suits pods versus sub-ohm tanks, and it saves you mixing a whole batch at the wrong mg.
Step-By-Step: How To Mix A Batch
Weigh or measure in the same order every time and mixing stays simple: base first, flavour next, nicotine last. That order gives you the most control over your final strength and stops you overshooting. If you are still fuzzy on what each ingredient actually does, our E-Liquid Explained: The Complete UK Guide breaks the components down before you start pouring.
Prep and measure
Get everything laid out before you open a single bottle. You want a clear bench, gloves on, and your recipe written down.
- Measure your VG and PG first into the mixing bottle, hitting your target ratio (say 70/30 for a sub-ohm shortfill-style mix)
- Use a syringe or scales for accuracy, guesswork is how you end up with a weak or harsh batch
- VG is thick and pours slowly, so give it time to settle in the bottle rather than rushing it
Combine base, flavour and nicotine
With your base in, add flavour concentrate next, working to the percentage in your recipe. Most fruit and dessert concentrates sit somewhere between 10% and 20%, but follow the specific figure for the flavour you are using.
Add nicotine last. Measuring it in at the end means you are adjusting the final piece against a known volume of base and flavour, so your strength lands where you want it. Remember TPD limits your nicotine base to a maximum of 20mg/ml in the UK, so factor that ceiling into your recipe before you start.
Shake, cap and label
Cap the bottle tight and shake hard. VG is heavy and slow to blend, so a quick swirl will not cut it. Give it a proper minute of shaking until the liquid looks uniform with no streaky layers.
Then label every single bottle before it goes anywhere. Write down:
- Strength (mg/ml)
- VG/PG ratio
- Flavour and percentage
- Mix date
That label is not admin for the sake of it. It tells you the strength at a glance, lets you track how a recipe performs after steeping, and keeps a nicotine-containing bottle clearly identified for safety. An unlabelled bottle of homemade e-liquid is a problem waiting to happen, especially if you mix more than one recipe in a session.
Steeping: How To Make Your Mix Taste Its Best
Freshly mixed e-liquid rarely tastes its best straight away. Steeping is the resting period that lets the flavour compounds, nicotine and base blend together and mellow, and it is the difference between a thin, sharp mix and a rounded one that actually tastes like the recipe promised.
Why steeping matters
When you first shake up a batch, the concentrate sits on top of the VG/PG base rather than fully married into it. Give it time and the harsh edges soften, the notes deepen, and everything reads as one flavour rather than a stack of separate ones.
- Store your steeping bottles in a cool, dark place, a cupboard or drawer well away from sunlight and heat
- Shake the bottle periodically, a good few seconds every day or two
- 'Breathe' the mix occasionally by leaving the cap off for a few minutes, which lets off-notes escape and a little air in
Sunlight and heat degrade nicotine and flavour over time, so dark storage is not optional if you want the mix to hold up.
Steeping timings by flavour type
How long to steep DIY e-liquid depends entirely on what you have made. As a rough guide:
- Fruits and menthols: a couple of days to a week. These are bright and volatile, and over-steeping can actually dull them
- Bakery, cream and custard: two to four weeks. The heavier compounds need proper time to develop that thick, rounded body
- Tobaccos: three to four weeks and often longer, as they mellow and gain depth the more patience you give them
If a recipe tastes flat or too sharp on day one, that is usually a steeping issue, not a bad recipe. Give it the time before you write it off.
Speed-steeping methods
If you cannot wait, a warm-water bath speeds things up. Seal the bottle tightly, sit it in a bowl of warm (not hot) water for 15 to 20 minutes, then shake. Repeat as needed. The gentle warmth helps the compounds blend faster.
The catch is that heat is hardest on delicate flavours. Fruits, menthols and lighter profiles can degrade with a warm bath, so keep it brief and keep the water warm rather than scalding. Custards and tobaccos handle it far better. For the full breakdown of timings, methods and what actually works, have a look at our E-Liquid Steeping: The Complete Guide.
Cost Per Batch: Is DIY Actually Cheaper?
Yes, and by a wide margin once you buy in bulk. The upfront outlay on VG, PG and concentrates stings a little, but the cost per ml drops fast once you spread those base ingredients across a few batches. Shop-bought shortfills and salts carry the cost of bottling, branding and, from 2026, excise duty. DIY strips most of that out.
Cost breakdown per 100ml
Here is roughly where the money goes on a typical 100ml batch, mixed from bulk base and concentrate:
- VG and PG base: buy a litre of each and your base works out at pennies per 100ml
- Flavour concentrate: usually the biggest single cost, around 10% of the mix, but a 30ml bottle stretches a long way
- Nicotine: optional, and if you add it you buy compliant strengths and factor duty in separately
- Bottles and labels: a one-off cost that disappears once you reuse them
Mixed sensibly, a 100ml unflavoured or lightly flavoured batch lands well under what the same volume costs pre-mixed on the high street. The concentrate is what moves the needle, so a cheaper single-flavour recipe costs less per ml than a complex six-concentrate blend.
How vape tax changes the maths
The 2026 UK e-liquid duty widens the gap. From October 2026, GOV.UK confirms a Vaping Products Duty applies to all e-liquid at a flat 22p per ml, plus VAT on that duty. That lands on every pre-filled bottle you buy, and it lands hard on small formats.
Here is the duty impact on a shop-bought 10ml bottle:
That is over £2.60 of tax stacked onto a bottle that cost under two quid to make. DIY concentrates and base are also caught by the duty regime where they contain nicotine, but nicotine-free bases and concentrates sit outside the per-ml liquid duty, so mixing your own keeps far more of your money in the batch and less in the tax. For the full picture on how the levy is applied and what is and is not caught, read The Vaper's Guide to UK Vape Tax (2026).
When DIY pays off
The return improves the bigger you mix. Fixed costs like bottles, a set of scales and your concentrate collection get spread thinner across more ml, so cost per ml keeps falling as batch size climbs.
- 250ml or 500ml batches of a house recipe you vape daily are where DIY genuinely earns its keep
- One-off 30ml tester mixes rarely beat shop prices once you count your time and wastage
- Nicotine-free shortfill-style bases benefit most from the duty gap, since you dodge the per-ml liquid levy entirely
If you go through a lot of one all-day flavour, DIY is comfortably cheaper than the high street and the 2026 duty only sharpens that. If you like variety and small quantities, the savings shrink and a good-value shortfill may suit you better.
Safety, Storage & UK Legal Compliance
Neat nicotine is a hazardous substance, so treat it with respect. Handled sensibly it is nothing to fear, but a splash on bare skin or a bottle left within reach of a child is exactly the kind of thing DIY safety is built to prevent.
Handling nicotine safely
The nicotine base does the concentrating, so it needs the most care in your mixing routine.
- Wear nitrile gloves whenever you handle nicotine base. It absorbs through skin, and a spill on your hands is easily avoided.
- Mix in a ventilated space. A kitchen with a window open is fine. You are not working in a lab, but you do not want to be breathing over an open bottle of high-strength base.
- Keep nicotine well away from children and pets. Store it separately from your everyday liquids, ideally in a locked or high cupboard.
- Wipe up spills immediately with paper towel, and rinse any skin contact with plenty of water.
Once your base is diluted down into a finished 3mg or 6mg mix it is far less concentrated, but the same commonsense storage still applies.
Storage, shelf life & disposal
Heat, light and air are what degrade an e-liquid, so store everything to keep those out.
- Cool and dark is the rule. A cupboard away from radiators and direct sun is ideal. Amber or opaque bottles help.
- Freebase nicotine typically lasts one to two years stored properly, and noticeably less once a bottle is opened and exposed to air. Buy nicotine base in quantities you will realistically get through.
- Watch for a colour shift. Nicotine that has gone from pale to a deep amber or brown has oxidised, and the flavour and throat hit will have dropped off.
- Dispose of old liquid responsibly. Do not pour it down the sink. Soak it into paper towel or cat litter, seal it in a bag, and check your local council guidance for household chemical waste.
Labelling and gifting rules
DIY for your own use sits in a different bracket from selling. If you mix a batch, keep a simple label on it: the strength, the VG/PG ratio, and the date you mixed it. That saves confusion when you have three shortfills on the go and cannot remember which is the 6mg.
UK rules on nicotine strength and bottle size still frame the picture here. Retail nicotine-containing e-liquid cannot exceed 20mg/ml or come in bottles over 10ml, and nicotine shots you buy to add to shortfills are capped at 20mg/ml for the same reason. When you mix at home you stay comfortably inside those strengths by diluting down to a normal vaping level.
Gifting or passing on your homemade liquid is a grey area, and anything resembling selling brings you into TRPR and notification territory that is well beyond home mixing. Keep DIY batches for your own use. For the full detail on strengths, bottle sizes and where the law draws its lines, have a look at our guide to UK Vaping Laws, Safety & Compliance.
Troubleshooting Common DIY Mixing Problems
Most DIY problems come down to three things: ratio, nicotine, or patience. Get those right and the majority of dodgy batches sort themselves out. Here is how to diagnose what has gone wrong and fix it on the next mix.
Harsh throat hit or too strong
A harsh, scratchy hit usually points at one of two culprits: too much PG or too much nicotine.
- Too much PG: PG carries throat hit. If your mix bites hard on the inhale, drop the PG and lean higher-VG on your next batch. Moving from 50/50 to 60/40 or 70/30 smooths things out noticeably.
- Nicotine too high: If the strength stings more than you expected, your maths may be off, or you have simply mixed stronger than you vape. Recalculate your target mg and mix a lower-strength batch. Remember UK-legal nicotine bases and finished e-liquid top out at 20mg/ml.
- Coil mismatch: A high-VG mix on a high-power sub-ohm coil hits harder than the same juice on a gentle MTL pod. Match the mix to the kit.
If the harshness feels dry and papery rather than sharp, that is more likely a coil issue than a mix issue. Have a read of Why Does My Vape Taste Burnt? before you blame the recipe.
Weak or muted flavour
Homemade vape juice with no flavour is nearly always one of two problems, and time fixes the first.
- Not steeped long enough: Fresh mixes taste flat and thin. Many flavours, especially custards, tobaccos and creams, need days to a couple of weeks to come together. Give it time before you write the recipe off.
- Concentrate percentage too low: If it is still muted after a proper steep, bump the flavour percentage on your next mix. Nudge it up by 1 to 2% at a time rather than doubling it.
- Over-flavoured, oddly: Too much concentrate can mute a mix as much as too little, muddying the profile into something dull. If more flavour made it worse, dial back down.
- Palate fatigue: Vape the same flavour all day and your taste buds stop registering it. Switch to a different profile for an afternoon, then come back to it.
Separation, cloudiness and 'off' taste
A freshly mixed bottle looking cloudy or showing distinct layers is completely normal before you shake it. PG, VG, nicotine and concentrates settle at different rates and need mixing back together.
- Cloudiness or layers after mixing: Shake it hard, then leave it to breathe. This nearly always clears on its own.
- Persistent cloudiness or won't blend: If it stays cloudy or grainy days later, you likely have incompatible concentrates, or a water-based flavouring fighting a heavy VG base. Some concentrates just do not play nicely together.
- 'Off' or sour taste: A genuinely bad, chemical or sour note points at oxidised nicotine (usually old or badly stored base) or a concentrate past its best. Check your nicotine base is fresh and stored cold and dark.
When in doubt, mix small test batches of 30ml before committing a big batch. It is far less frustrating to bin a small mix than a full 250ml bottle you have waited a fortnight to steep.
Prefer Not To DIY? Simpler Alternatives
Full DIY is not the only way to build a flavour you actually like. If measuring bases and weighing concentrates sounds like more faff than it's worth, there are three routes that get you most of the way there with far less kit and mess.
Mix bar services
A mix bar service lets you build a custom flavour in-store without buying a full DIY setup. You pick your base ratio, choose your concentrates, and a member of staff mixes it up on the spot, often to a preset menu of blends you can tweak. Plenty of shops around the Midlands and beyond run them, so a search for a mix bar near you (Solihull, for instance) will usually turn up a counter that does it.
What you get:
- A bespoke bottle without owning scales, bottles or concentrates
- Someone experienced steering the ratio and nic level for you
- A quick taste-test loop before you commit to a bigger batch
The trade-off is you're paying for the service and you can't fine-tune it at 2am when inspiration strikes. For a one-off custom blend, though, it's the easiest way to make custom e-liquid without any of the setup.
Shortfills and longfills
This is the middle ground, and it's where most of our customers land. A shortfill is a larger bottle of nicotine-free liquid with room left at the top for a nic shot. You add the shot, give it a shake, and you've got a full-strength batch in under a minute. A longfill works the same way but with a concentrate-heavy base you top up with more liquid, giving you a touch more control over strength and volume.
Why it works so well:
- Near-DIY flavour range without measuring anything yourself
- Just one nic shot to add, no concentrates or PG/VG bases to buy
- Ready to vape almost immediately, with any steeping already done by the maker
We run refillable pod kits day to day and sub-ohm tanks in the evenings, so we mix salts and shortfills in roughly equal measure. For most people, a good shortfill covers 90% of what DIY offers with about 10% of the effort.
Refillable pods vs full DIY kits
Refillable pods keep things dead simple while still letting you use your own liquid. You fill the pod from whatever bottle you like, be that a shortfill, a 10ml salt or your own DIY mix, and swap the coil or pod when the flavour fades. Full DIY kits, by contrast, suit hobbyists who enjoy the mixing itself and want total control over every ratio and note.
The honest split:
- Refillable pod: low fuss, portable, works with any liquid you own. Ideal if you just want to vape your chosen flavour without the workbench.
- Full DIY kit: more upfront cost and time, but complete control over flavour, ratio and cost per ml. Worth it if mixing is part of the fun.
We've seen more switchers move from big-puff disposables to refillable pods since the 2026 duty landed, and it's easy to see why: the same liquid choice, far less spend, none of the mixing admin.
XROS 6
A refillable pod kit that's about as fuss-free as it gets. Fill it from your own bottle, whether that's a 50/50 salt or a shortfill, and the 0.8 ohm mesh pod handles both cleanly. A solid pick if you want your own liquid without a full DIY setup.
Caliburn G5
A tidy MTL pod that draws like a cigarette and refills from any bottle you fancy. Great for switchers stepping up from disposables who want to pick their own flavour without measuring a thing.
New to pods?
Not sure which kit suits your vaping style? Our beginner walkthrough breaks down MTL versus DTL, pod versus tank, and what to look for before you buy.
Whichever route you take, the goal is the same: your flavour, your strength, on your terms. Full DIY gives you the most control, shortfills give you most of that for far less effort, and a refillable pod means you can vape whatever you've made or bought with none of the kit sat on the side.
Frequently Asked Questions
Yes, plenty of vape shops run mix bar or flavour-building counters where you pick concentrates and a member of staff blends them to your chosen strength on the spot. It's a smart way to get a custom liquid without buying bottles, bases and calculators for a full DIY kit at home. Think of it as the halfway point between grabbing a shop-bought bottle and setting up your own mixing station.
Refillable pod kits are the answer here, letting you drop your own mix straight into the pod without any of the faff of a full open system. They're a much simpler starting point than a proper DIY setup, since you're not juggling PG/VG ratios or nicotine shots for a coil build. Full DIY kits with sub-ohm tanks come into play once you want total control over flavour and vapour density, but for everyday convenience a refillable pod does the job nicely.
For sub-ohm setups go with 70/30 VG-heavy mixes for thick vapour and a smoother throat hit, while 50/50 suits MTL kits and pod systems better since it flows more easily through tighter airflow and smaller coils. Flavour concentrates typically sit between 10 and 20% depending on the recipe and how strong the flavour house pitches its concentrates. Always run your numbers through a proper mixing calculator first, it saves you wasting concentrate and keeps your nicotine strength accurate to the millilitre.
Steeping time depends heavily on the flavour profile: fruit mixes are often ready in a few days, while custards, bakery and tobacco blends can need several weeks to properly round out. Keep bottles somewhere cool and dark, giving them a shake every day or two to help the flavours marry. Warm-water speed-steeping can shortcut the process, but we'd be cautious with it on delicate or complex flavours as it can knock the subtlety out of them.
Yes, buying base PG/VG, nicotine shots and concentrates in bulk brings your cost per ml down well below shop-bought bottles, especially once you're mixing in batches of 100ml or more. With the UK's 2026 e-liquid duty pushing up prices on pre-made bottles, that gap in favour of DIY only widens. The bigger the batch you mix, the further your cost per ml drops, making it well worth it if you're getting through liquid regularly.
Yes, mixing your own e-liquid for personal use is legal in the UK as long as you stay within TPD rules. Nicotine shots are capped at 20mg/ml strength and 10ml bottle size, so you'll always be diluting rather than mixing from raw high-strength nicotine. Keep finished bottles properly labelled and stored safely, and be aware that giving away or selling your mixes to others brings a different set of rules into play.
Harshness on the throat usually points to too much PG in your mix or a nicotine strength that's higher than your setup is comfortable with, so check your ratio and dial the nic down if needed. Weak or flat flavour is nearly always a steeping issue, give it more time or nudge your concentrate percentage up slightly next batch. Don't worry if a fresh mix looks a bit cloudy before you shake it, that's completely normal and settles once everything's combined.
About the author

Related guides
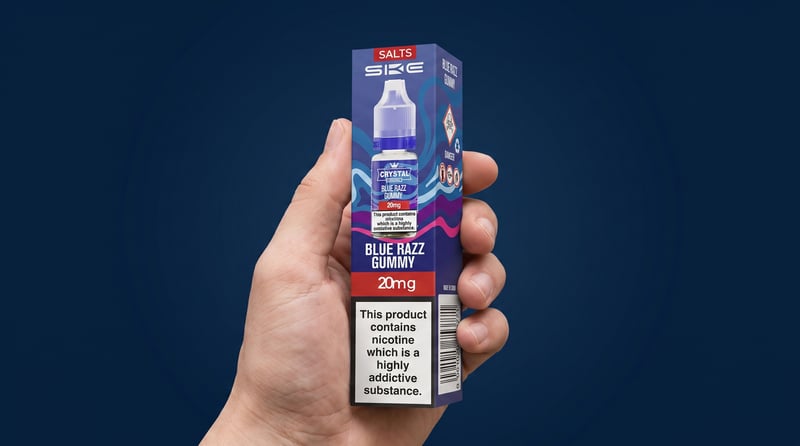
Why Has My Vape Lost Flavour? Vaper's Tongue & 8 Real Fixes
Lost your vape flavour? Learn what vaper's tongue is, how long it lasts, plus 8 tested fixes for coils, wattage, airflow and e-liquid. UK guide.
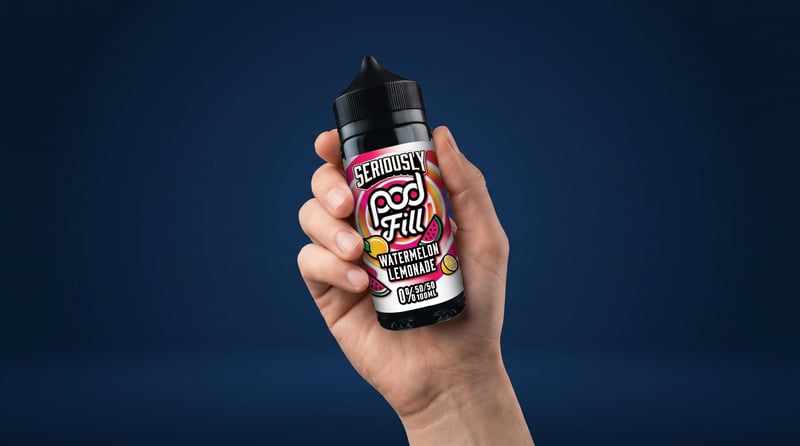
E-Liquid Steeping: The Complete Guide
How long to steep by flavour, every method ranked for speed vs safety, over-steeping warning signs and UK storage tips. The complete steeping guide.
What Are Nic Salts? Nicotine Salts vs Freebase E-Liquid
What are nic salts? Learn how they differ from freebase, which strength and coil suit you, and how to get a smooth, satisfying hit.