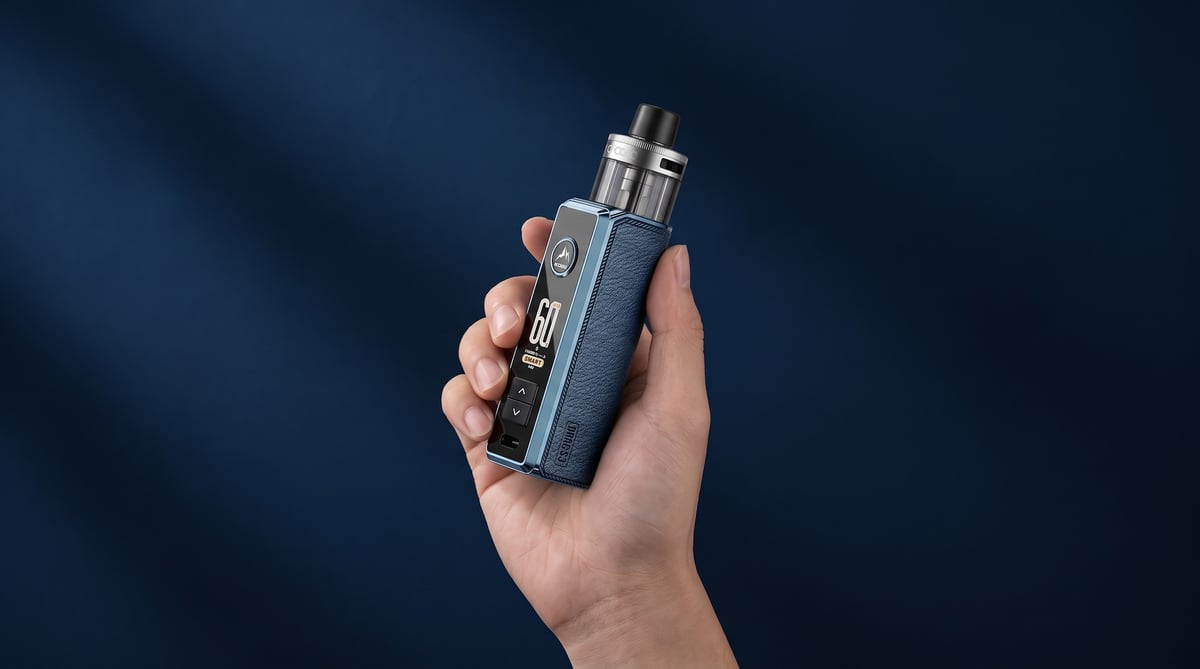
How To Clean & Maintain Your First Vape Kit
 Vape & E-Liquid Team
27 min read
Wipe the mouthpiece daily, clean the contacts weekly, and give the pod or tank a full clean and re-prime each time you fit a new coil. This guide covers how to clean and maintain your first vape kit with a simple schedule that suits refillable pods, sub-ohm tanks and prefilled kits.
Why Cleaning Your Vape Matters
Cleaning a vape kit is mostly about wiping, rinsing and swapping parts at the right time, not scrubbing. The routine depends on what you own. A refillable pod vape kit, a sub-ohm vape kit and a box mod vape kit each need slightly different care, and prefilled pod kits barely need any. If you are still deciding what to buy, our guide to choosing your first vape kit covers which type suits you before you think about upkeep.
So, do you need to clean a vape? Yes, but far less than most switchers expect. A few minutes a week covers it for most kits. We vape every day and we test what we sell before it goes on the shelf. We run refillable pod kits day to day and sub-ohm tanks in the evenings, so this guide covers both setups the way we actually use them.
There is also a cost reason to keep on top of it. Vaping Products Duty has applied to e-liquid since 1 October 2026, with retailers able to sell through pre-duty stock until 31 March 2027, so every leaked or wasted millilitre now costs you more than it used to.
5 parts need attention: mouthpiece, pod or tank, coil, contacts, battery and port
Learning how to clean and maintain your first vape kit starts with knowing which bits matter. Every kit, from a compact pod to a box mod, breaks down into the same five areas:
- Mouthpiece (drip tip): the part your lips touch. It collects condensation and the odd spit-back of liquid, so it needs the most regular wipe.
- Pod or tank: holds your e-liquid. Old liquid and residue can build up here, especially when you switch flavours.
- Coil: the heating element that turns liquid into vapour. This is a consumable, covered below.
- Contacts: the small metal points where the pod or tank meets the device. Liquid and condensation can settle here.
- Battery and charging port: the power side of the kit. Keep it dry, keep the port free of lint and debris, and never rinse it.
If flavour goes flat, the kit starts gurgling or it fires inconsistently, these five areas are where to look first. Your kit's manual is the place to confirm the manufacturer's own cleaning guidance for your specific device.
Clean vs replace: why coils are swapped
This is the biggest point of confusion for new vapers. Coils are consumables, much like a razor blade, so when a coil tastes burnt or the flavour has faded, you fit a new one rather than trying to wash the old one back to life. The rest of the kit gets cleaned; the coil gets replaced.
How long a coil lasts depends on your liquid, your wattage and how much you vape. Sweeter, darker liquids tend to gunk coils faster than clean fruit or menthol profiles, and higher-VG shortfills in a sub-ohm tank put different demands on a coil than 50/50 salts in a pod. Check your kit's manual for the manufacturer's replacement guidance, and keep a spare coil or pod in the drawer so you are never caught short.
Fitting a new coil properly matters as much as knowing when to swap it. In our own testing, priming a mesh coil for a good five minutes before the first pull is the single biggest thing that stops a burnt first hit. Fill the pod or tank, let it sit, and resist the urge to fire straight away.
Vape Maintenance Schedule: Daily, Weekly and Every Coil Change
Clean little and often. Thirty seconds a day, five minutes a week and a proper clean every time the coil or pod changes is the whole vape cleaning routine, and it covers a pod kit, a sub-ohm tank or a prefilled pod device. If you have been wondering how often you should clean your vape, this is the rhythm we follow ourselves. We run refillable pod kits day to day and sub-ohm tanks in the evenings, so both get the same treatment.
Daily Time: 30 sec
- Wipe the mouthpiece
- Check for condensation around the airflow
- Check the e-liquid level and top up before it drops below the coil
Tools needed: kitchen roll
Weekly Time: 5 min
- Remove the pod or tank
- Wipe the contacts with dry kitchen roll or a cotton bud
- Wipe away condensation in the pod bay
- Refit and check it clicks home firmly
Tools needed: kitchen roll, cotton buds
Every Coil Change Time: 15 min hands-on, plus drying
- Empty the pod or tank
- Rinse in warm water, if your manufacturer permits it
- Air-dry fully
- Fit a new coil and prime it before the first pull
Tools needed: kitchen roll, cotton buds, warm water
Daily: 30-second checks
These take less time than a refill and catch most problems before they start.
- Wipe the mouthpiece. A quick pass with kitchen roll clears residue and stray drips. Pull the drip tip if it comes off and give the inside a wipe too.
- Check for condensation around the airflow. Vapour cools and collects as liquid in the airflow channels. Left alone, it creeps towards the contacts and can cause gurgling or spitting on the inhale. A dab with kitchen roll sorts it.
- Check the e-liquid level. This is the one that matters most. Never let the coil run dry. Once the wick stops getting fed you get a dry, scorched hit, and on cotton that can finish the coil early. Top up while you can still see liquid sitting above the coil's intake holes.
Weekly: wipe, rinse and dry
Once a week, take the pod or tank off the device and give the joins some attention.
- Remove the pod or tank. On a pod kit it pulls straight out. On a sub-ohm kit, unscrew the tank from the 510 connection.
- Wipe the contacts. Use dry kitchen roll or a cotton bud on the contacts on the pod and the device. Sticky e-liquid here is a common cause of intermittent firing.
- Wipe away condensation in the pod bay. Pod bays collect liquid that has worked its way down. Dry the bay out thoroughly before refitting.
- Keep it dry. The device itself, the battery and the charging port should never go under a tap. Dry kitchen roll and cotton buds do everything you need on the electronics side.
If you run a prefilled pod kit, this weekly wipe of the contacts and pod bay is most of the maintenance available to you, since the pods themselves are sealed and replaced rather than cleaned.
Every coil or pod change: full clean and re-prime
A coil change is the natural point for a deep clean, because the pod or tank is empty and apart anyway.
- Empty the pod or tank. Pour out any remaining e-liquid and remove the old coil.
- Rinse in warm water, if the manufacturer permits. Check your kit's manual first, as some pods and tanks are not designed to be rinsed. Warm, not boiling, and keep the battery and device well away from the sink.
- Air-dry fully. Shake out the excess, pat it down with kitchen roll, then leave it to dry completely. Any water left in the chimney or around the seals will dilute your e-liquid and can cause gurgling or leaks. Overnight is the safe option if you have a spare pod to run in the meantime.
- Fit a new coil and prime it. Drop a little e-liquid directly onto the exposed cotton at the coil's intake holes and down the centre, fill the pod or tank, then leave it to soak. In our own testing, priming a mesh coil for a good five minutes before the first pull is the single biggest thing that stops a burnt first hit. Take a few gentle pulls without firing, then start at the lower end of your coil's wattage range and work up.
Stick to this vape maintenance schedule and your coils last longer, flavour stays cleaner on the exhale, and most leaks and no-fire faults never get the chance to develop.
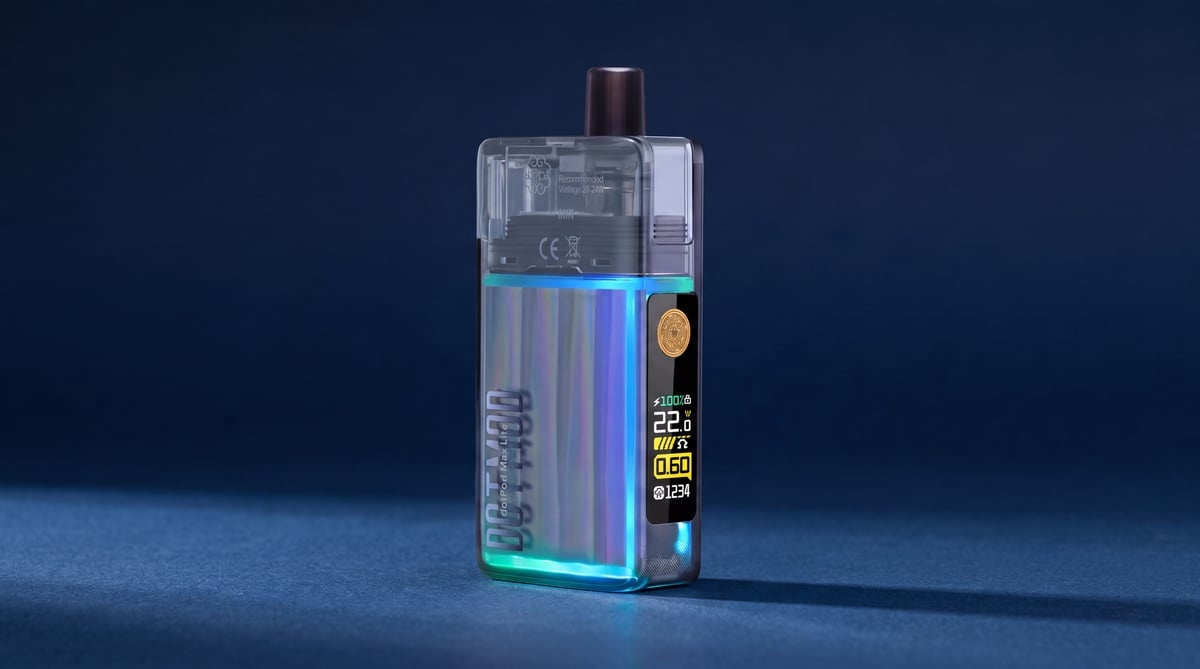
How To Clean A Refillable Pod Vape Kit (Step by Step)
Rinse the pod with warm water, dry it completely, wipe the contacts and prime before you vape again. That routine covers most pod vape kits on the market, but how you clean depends on one thing: whether your coil comes out of the pod or is built into it. Get that right first and the rest is simple.
Pods with replaceable coils vs pods with built-in coils
Every refillable pod falls into one of two camps, and they need different care.
Replaceable-coil pods
- The coil pushes or clicks out of the base of the pod
- You clean the pod shell and swap the coil when the flavour fades
- One pod can last through several coils, so a proper rinse pays off
Built-in-coil pods
- The coil is sealed into the pod and cannot be removed
- When the flavour dulls or you get a burnt edge, you replace the whole pod
- Cleaning is limited to wiping the outside, the mouthpiece and the contacts
If you are not sure which you have, check the pod packaging or the manufacturer's manual for your kit. A quick check at the base of the pod also works: a coil you can grip and pull free means it is replaceable.
Rinsing the pod: water, drying time and what to avoid
You can rinse your vape pod with water if it is an empty replaceable-coil pod shell with the coil taken out. Do not run water through a built-in-coil pod, because the wick will soak it up and you will be vaping watery, spitting e-liquid until it dries out, if it ever fully does.
The single biggest mistake is refilling a pod that is still damp. Trapped water dilutes the flavour and causes spitting on the first few pulls, so drying matters as much as rinsing.
What to avoid:
- Soap that leaves residue. Warm water on its own is enough to shift old e-liquid, and leftover soap will taint the next fill
- The dishwasher. The heat and detergent are too harsh for pod plastics and seals
- Boiling water. Warm from the tap does the job without risking the pod's shape
- Rushing the dry. Give the pod a full air-dry, or blow the water out and leave it upright on kitchen roll, before refilling
Always follow the drying time in your kit's manual where one is given.
Step 1: Remove and empty the pod Pull the pod out of the device and tip any remaining e-liquid into the sink or onto kitchen roll. Open the fill port so nothing is left sitting in the tank.
Step 2: Remove the coil if it is replaceable Pull the coil out of the base of the pod and set it aside. If your pod has a built-in coil, skip the rinse entirely and just wipe the outside and mouthpiece with kitchen roll.
Step 3: Rinse in warm water Run the empty pod shell under warm tap water until the old e-liquid and any flavour residue are gone. No soap residue, no dishwasher, no boiling water.
Step 4: Dry it fully Air-dry for 12 to 24 hours, or blow the water out through the mouthpiece and leave the pod on kitchen roll until it is bone dry. Check your manual for the manufacturer's own drying guidance.
Step 5: Wipe, refill, prime and wait Wipe the pod and device contacts dry, fit a fresh coil if needed, refill and let the coil soak before your first pull. Firing too early is how you get a dry hit.
Cleaning the pod bay and magnetic contacts
The pod bay is where condensation and the odd leak end up, and gunk on the contacts is a common cause of a kit that will not fire or only fires intermittently.
- Take the pod out and look. Any e-liquid pooled in the bay or on the magnets needs to go
- Use a dry cotton bud or folded kitchen roll to wipe the contacts on both the device and the base of the pod
- Keep water away from the device. Only the pod gets rinsed, never the battery section or the pod bay
- Wipe the contacts every time you swap or refill a pod. It takes seconds and keeps the connection clean
Once the contacts are clean, prime before you vape. In our own testing, priming a mesh coil for a good five minutes before the first pull is the single biggest thing that stops a burnt first hit. Our guide on how to prime a vape coil or pod walks through the full method, including a few unpowered draws to pull e-liquid into the wick.
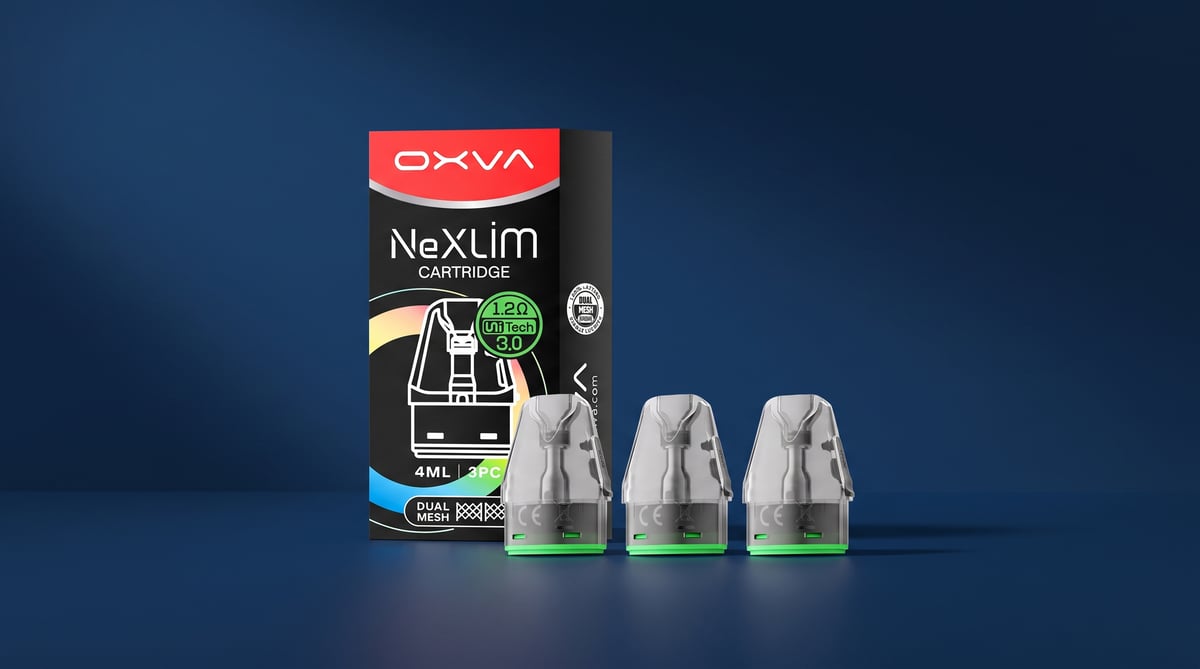
Model notes: XROS 6 and NeXLIM-style kits
These are two of the most popular refillable pod kits in the UK, and the same principles apply to both. Confirm the coil design of your exact pod against the manufacturer's manual before you rinse anything.
- Check whether your XROS pod has a built-in or removable coil before rinsing. If it is built in, wipe the outside and mouthpiece only and swap the pod when the flavour drops off
- The XROS pods sit on magnetic contacts, so wipe both the pod base and the bay at every refill
- After fitting a new pod, fill it, let it sit and prime as above before your first pull
- Identify your pod type from the packaging or manual. If the coil comes out, pull it before rinsing the shell and fit a fresh one once the pod is fully dry
- Pay attention to the base of the pod and the bay, where condensation tends to collect, and keep it wiped dry
- Prime every new coil properly. Across the mesh coils we stock, 0.8 ohm pods are the sweet spot most of our customers settle on for 50/50 salts, and a well-primed coil at that resistance gives clean flavour from the first pull
Whichever kit you run, the routine stays the same: identify the coil type, rinse only what can be rinsed, dry fully, wipe the contacts and prime before you fire.
How To Clean A Sub-Ohm Tank or Box Mod Kit
A sub-ohm tank is mostly rinseable glass and metal sitting on a mod that must never see a drop of water. Get that split clear and cleaning one is no harder than cleaning a pod kit. Searches for sub ohm vape kits, box mod vape kits and advanced vape kits show plenty of newer vapers moving up to bigger hardware, often with no idea how to look after it. We run refillable pod kits day to day and sub-ohm tanks in the evenings, so we mix salts and shortfills in roughly equal measure. Here is how we handle the bigger kit.
Pod Kit
Parts you can rinse: The empty pod shell (with the coil removed, if it is replaceable) and the mouthpiece.
Parts that must stay dry: The device body, the charging port and the pod contacts.
Typical clean frequency: A quick wipe at every refill, and a proper rinse at each coil or pod change.
Coil replacement trigger: Muted flavour, a sharp or burnt edge on the inhale, or darkened liquid in the pod window.
Common post-clean issue: Leftover water in the pod causing a spitty, diluted first few pulls.
Sub-Ohm Tank / Box Mod Kit
Parts you can rinse: The tank glass, the tank sections and chimney (coil out), and the drip tip.
Parts that must stay dry: The mod body, the 510 connection, the screen, the buttons, the battery bay and the charging port.
Typical clean frequency: A wipe of the 510 and drip tip every few days, and a full strip-down at every coil change or flavour switch.
Coil replacement trigger: The same flavour and burnt-hit signs, which often show up sooner because the coil works through more liquid.
Common post-clean issue: A pinched or missing O-ring causing leaks, or a tank that is still damp causing gurgling.
Larger coils run at higher wattage and go through a 100ml shortfill far faster than a pod gets through a 10ml salt. As a result, cleaning and coil-change intervals on a sub-ohm tank may be shorter than you are used to. Use flavour and hit quality as your guide, not the calendar, and have a look at our breakdown of how long vape coils last for what to expect from different builds.
Taking a tank apart safely: glass, seals and drip tip
Lay a towel or a few sheets of kitchen roll down before you start. Tank parts are small, glass is slippery when wet, and an O-ring rolling off the kitchen worktop is gone for good.
- Empty it first. Pour any remaining liquid back into its bottle or down the sink, then unscrew the tank from the mod.
- Strip it in order. Remove the drip tip, then the top cap, then the coil, then the base. Lay each part out left to right so reassembly is simply the reverse.
- Keep every O-ring with its part. Seals on the top cap, base and drip tip are often different sizes. Mixing them up is the number one reason a freshly cleaned tank starts leaking.
- Check the glass. Hold it up to the light and run a fingertip around both rims. Any crack or chip, however small, means it needs replacing before it goes back on.
- Rinse in warm water, not boiling. A drop of washing-up liquid shifts sticky shortfill residue well, as long as you rinse it all away afterwards. Keep the coil out of the water entirely.
- Dry it properly. Shake off the excess, blot with kitchen roll, then leave the parts to air-dry. Overnight is ideal. Trapped water is what makes a clean tank gurgle.
When you rebuild, prime the new coil before the first pull. In our own testing, priming a mesh coil for a good five minutes before the first pull is the single biggest thing that stops a burnt first hit.
Cleaning the 510 connection and threads
The 510 connection is the threaded socket on top of the mod where the tank screws in. Its centre pin carries power to the coil, so condensation and leaked e-liquid here cause most "no atomiser" and intermittent-firing faults.
- Unscrew the tank and wipe the 510 pin and the surrounding threads with a dry cotton bud or a twist of kitchen roll.
- Do the same to the threads and pin on the underside of the tank.
- Leave the pin as it is. If it is spring-loaded, never lever it up or press it down with anything sharp.
- Never run water over the mod body or the battery area. If liquid has pooled in the 510 well, soak it up with tissue and leave the mod upright to dry before reattaching the tank.
Box mods: buttons, screens and removable-battery doors
Learning how to clean a box mod is mainly about keeping liquid out of it, rather than getting anything into it.
- Fire and adjustment buttons: Sticky buttons are almost always dried e-liquid. Wipe around them with a cloth that is barely damp, never wet, and press the buttons a few times so the residue works loose.
- Screen: A dry microfibre cloth is all it needs. Skip sprays and wet wipes, as moisture can creep in around the edge of the screen.
- Charging port: Keep it dry. A soft, dry brush clears pocket fluff.
- Removable-battery doors: Take the batteries out before you clean the bay. Wipe the battery contacts and the inside of the door with a dry cloth, and check each battery wrap for nicks or tears as you go. A damaged wrap means that cell should not go back in.
Model notes: Aegis Legend 5 and Luxe XR Max 2
People regularly ask us how to clean the Aegis Legend 5 and how to clean the Luxe XR Max 2, and both are popular first steps up from a pod kit. The routine above covers the essentials for both: strip and rinse the tank or pod section with the coil removed, dry wipe the connections, and keep water well away from the device body.
Beyond that, the manual in the box is the final word. Model-specific details, such as which parts are designed to come apart, how the coil seats and any guidance on moisture, vary between devices and revisions. Have a look at the manufacturer's instructions before you take anything apart that you are not sure about. If a part does not come away with gentle pressure, leave it where it is.
Prefilled Pod Kits: What You Can (And Can't) Clean
Prefilled pod kits need far less maintenance than any refillable setup: you look after the reusable battery, and the pods look after themselves until you swap them. That covers kits like the Pixl 8000, the Lost Mary Nera 30K, the Hayati range and the IVG Smart Max. These are some of the most popular kits in the UK, yet most cleaning guides skip them entirely. If you have searched how to clean a Pixl 8000 or what Lost Mary Nera 30K maintenance involves, the routine below takes about two minutes.
Why prefilled pods are not rinsed or refilled
A prefilled pod is a sealed unit. The coil, wick and e-liquid are factory-assembled and closed off, so there is nothing inside you can safely reach or clean. Running a prefilled pod under the tap soaks the wick with water, dilutes the e-liquid and can leave moisture sitting where the pod meets the battery. That is a quick route to spitting, gurgling and a dead pod.
Treat the pod as a consumable, not a component:
- Do not rinse it. Water and a sealed wick do not mix.
- Do not prise it open. Forcing the seal risks leaks onto the battery and can damage the pod housing.
- Do not try to refill it. Sealed pods are designed to be used once and swapped, and tampering with them is not how the kit is meant to be used.
- Do wipe the outside. A dry tissue or cotton bud around the mouthpiece and the pod base takes off condensation and any stray e-liquid.
Manufacturers differ on small details, so check the leaflet in the box or the brand's own guidance for your specific kit before doing anything beyond a dry wipe. For Hayati pod kit cleaning, the same rule applies as with the Pixl and Lost Mary ranges: clean the outside, never the inside.
Keeping the battery section clean
The battery is the part you keep, so it is where your maintenance effort goes. Two areas matter most: the contacts where the pod clicks in, and the charging port.
- Contacts: pop the pod out and wipe the metal contacts in the battery with a dry cotton bud or a folded tissue. Do the same to the contacts on the bottom of the pod. A little condensation builds up here with normal use, and keeping it dry gives you a clean connection every time.
- Charging port: check it for pocket lint and dust before you plug in. A gentle blast of air or a dry, soft brush clears it. Avoid poking metal objects into the port.
- Body: a slightly damp cloth on the outer casing is fine, as long as no moisture gets near the port or the pod bay. Finish with a dry cloth.
Keep the battery topped up and the contacts dry. Moisture or e-liquid sitting on the contacts is a common cause of the two faults that put people off prefilled kits: auto-firing, where the device activates on its own, and no-fire, where you pull and nothing happens. If you get either, take the pod out, dry both sets of contacts properly, let everything sit for a few minutes, then reconnect. Charge using the cable supplied or one recommended by the manufacturer, and if the fault carries on after a clean, the final section of this guide covers it in more depth.
When a prefilled pod is finished
A pod is done when the flavour fades, turns flat or slightly burnt, or the kit's indicator tells you the e-liquid has run out. Pushing on past that point is how you end up with a harsh, dry hit. Pull the old pod, give the battery contacts a quick wipe while they are exposed, and click in a fresh one.
A few habits keep the swap clean:
- Swap before it tastes burnt, not after. A fading flavour is the early warning.
- Wipe the contacts at every pod change. It takes seconds and keeps the connection reliable.
- Dispose of spent pods responsibly. They contain a coil and some leftover e-liquid, so use a vape recycling point rather than general waste.
We have seen more switchers move from big-puff disposables to refillable pods since the 2026 duty landed, and prefilled pod kits often sit in the middle of that journey. If you are using one now, the routine is simple: look after the battery, swap the pod when the flavour drops, and leave the sealed parts sealed.
Battery, Charging Port and Contact Care
Most "dead" vape kits aren't dead at all. A port packed with pocket lint, a contact crusted with dried e-liquid or a cell left baking on a dashboard will stop a perfectly good device in its tracks. Five minutes of care here does more for vape battery care than any amount of tank cleaning.
The contacts matter too. The small gold or brass pins where your pod or tank meets the device carry the power to the coil. Condensation and leaked e-liquid build up there, and that causes no-fire messages, flickering readings and dropped connections. Wipe them with a dry cotton bud or a square of kitchen roll every time you change a pod or refill a tank.
Cleaning the USB-C port safely
The main job when you clean a vape charging port is removing debris without damaging the pins inside. Keep it dry and gentle:
- Power off first. Lock or switch off the device before you go near the port.
- Use a dry cotton bud or a soft, dry brush. A clean, unused toothbrush or a small anti-static brush works well for lint.
- Never use metal. Pins, paperclips, needles and tweezers can scratch or short the contacts inside the port.
- No liquids in the port. Don't spray, rinse or dab anything wet into it. Keep cleaning fluids for the outside of the device only.
- Tilt and tap. Hold the port facing down and give the device a light tap to shake loose anything the bud has dislodged.
If e-liquid has got into the port, don't charge it. Leave the device switched off and port-down on kitchen roll so it can drain and dry out fully before you plug it in. Check your kit's manual as well, because many manufacturers give specific instructions for liquid exposure.
Vape not charging after cleaning? Work through these in order:
- Give it longer to dry. Even a trace of moisture can stop charging, so leave it overnight if you've wiped anything near the port.
- Check for debris with a torch. Compacted lint at the back of the port often stops the cable seating fully.
- Swap the cable and plug. Frayed or worn cables cause more charging faults than the devices themselves.
- Seat the cable properly. It should click home and feel snug, not wobble.
For the right cables, plugs and charge habits from day one, have a look at our guide on how to charge your first vape kit.
Storage and heat
Heat is hard on lithium-ion batteries and on e-liquid. A kit left in a hot car or on a sunny windowsill can leak, as warm e-liquid thins and pushes past seals. Heat can also wear the battery down over time.
- Keep it out of hot cars and direct sun. A glovebox in summer is no place for a vape kit.
- Store it upright. Standing the kit mouthpiece-up keeps e-liquid sitting on the coil rather than pooling around the airflow and contacts, which cuts down on leaks.
- Lock it when it's in a bag or pocket. Most kits have a lock function, usually five clicks of the fire button. It stops the kit firing by accident and stops pressure on buttons from draining the battery.
- Going away for a while? Empty the pod or tank and give the device a partial charge before you put it away.
We run refillable pod kits day to day and sub-ohm tanks in the evenings, and the habit of storing both upright on the desk overnight is about as low-effort as maintenance gets.
Removable batteries: wraps and safe handling
Some sub-ohm box mods take removable cells, usually 18650 or 21700 batteries. These need more attention than a built-in battery, because the outer plastic wrap is the insulation that keeps the cell safe to handle.
Check the wraps every time you swap or charge your batteries:
- Look for nicks, tears, splits or peeling, especially around the top edge where the wrap curls over the positive end.
- Check the insulating ring at the positive terminal is present and intact.
- Watch for dents, swelling or discolouration on the cell itself.
If a wrap is damaged or a cell looks dented or swollen, stop using it and replace it with a new cell suited to your mod. Recycle the old one at a battery recycling point rather than putting it in household waste.
Safe handling comes down to a few habits:
- Carry spare cells in a plastic battery case, never loose in a pocket or bag with keys and coins.
- Insert cells the right way round, matching the markings inside the battery door.
- Use a matched pair in dual-battery mods, same make, model, age and charge level.
- Use a dedicated external charger if your manual recommends one, and don't leave cells charging unattended.
Our law, safety and compliance guides go into battery safety in more detail, so read those alongside this section if your kit runs on removable cells.
After Cleaning: Fixing Leaks, Gurgling and No-Fire Problems
Most problems after a clean come from water left in the wrong place or a part refitted slightly out of line. That is good news, because nearly all of them sort themselves out with a proper dry, a careful reseat and a patient prime. Work through the fixes below before you assume a pod, tank or coil has failed.
Pod or tank leaking after a rinse
If your vape is leaking after cleaning, start with the seals. Rinsing and handling can push a silicone bung, O-ring or base gasket out of its groove, and even a slight misalignment lets e-liquid creep past.
- Check every seal by eye. Each O-ring should sit flat and even in its channel, with no twists, nicks or stretched sections. Swap out any that look damaged. Most tanks ship with spares in the box.
- Reseat the fill port bung. On refillable pods, press the silicone plug firmly back into place. A half-closed bung is one of the most common causes of a leak after a refill.
- Dry the pod fully before refilling. Water trapped in the pod body or around the coil seat thins out your e-liquid and helps it escape through the airflow. Shake it out, blot it with kitchen roll, and leave it in the open air until it is bone dry.
- Don't overtighten tank threads. Cranking a glass section down can crush or pinch the seal, and that causes leaks of its own. Hand-tight is enough.
If it still weeps after all that, have a look at our guide on why your vape is leaking. It covers the causes that have nothing to do with cleaning, like coil resistance, VG ratio and airflow habits.
Gurgling or spitting from leftover water
Vape gurgling after cleaning almost always means moisture is still sitting in the chimney, the airflow channel or the coil itself. When you fire, that water meets a hot coil and pops, so you hear crackling or feel spitting on the lips.
- Blow out the chimney. With the pod or tank empty, blow firmly through the mouthpiece end, then through the base. Do it over a sink or a sheet of kitchen roll.
- Tap out the airflow. Hold the pod or tank airflow-side down and tap it against a folded towel to clear trapped droplets.
- Give it time. Leaving parts to air-dry overnight is the safest route. A few hours on a warm (not hot) windowsill works if you are in a hurry.
- Pulse rather than hold. If a little gurgle lingers once you have refilled, take a few short, gentle pulls to clear the last of the condensation before you go back to full draws.
Gurgling that carries on after everything is dry usually points to flooding rather than water. Ease off on how hard you pull, and check your airflow is not closed down too tight for the coil you are running.
Device not detecting the pod or coil
Is your vape not working after cleaning, or showing "no pod", "check atomiser" or a blinking LED? Moisture or residue on the contacts is the usual suspect. Even a thin film of water or dried e-liquid can stop the device reading the coil.
- Remove the pod or tank and look at the gold or brass contacts on both the pod and the device.
- Dry both sides. Use a cotton bud or a dry corner of kitchen roll, and don't push hard on spring-loaded pins.
- Clear any sticky residue. If e-liquid has dried on, a cotton bud that is barely damp will lift it. Follow up with a dry one so nothing is left behind.
- Leave the device open for ten minutes or so to let any hidden moisture in the pod bay evaporate.
- Reseat firmly. Push the pod in until it clicks, or screw the tank down until it sits flush on the 510 connection. A tank sitting a fraction too high won't make contact.
On a box mod, also check the coil is screwed fully into the tank base. A loose coil reads as "no atomiser" or gives a jumpy resistance figure on screen.
Common cleaning mistakes to avoid
These are the mistakes we see most often from customers who have just made the switch to a refillable kit:
- Using the dishwasher. High heat and harsh detergent can warp plastic pods, cloud tank glass and wreck seals. Warm water by hand is all you need.
- Harsh solvents on plastic pods. Strong alcohols and household cleaners can craze or crack pod plastic, especially polycarbonate. Keep them well away from anything that isn't stainless steel or glass.
- Rinsing coils and refitting them wet. A water-logged coil gives you a spitting, muted first few puffs at best and a burnt one at worst. If you do rinse a coil, it needs to be completely dry before it goes near e-liquid. In practice, most of us simply fit a fresh one.
- Refilling and firing straight away. A newly fitted coil needs time to saturate. In our own testing, priming a mesh coil for a good five minutes before the first pull is the single biggest thing that stops a burnt first hit. Drip a few drops onto the exposed cotton, fill the pod or tank, then leave it to stand before you vape.
- Reassembling in the wrong order. Take a quick photo before you strip a tank down. It saves guessing where each seal and chimney section goes when you put it back together.
Get the drying and priming right and nearly every post-clean problem disappears before it starts.
Frequently asked questions
How often should I clean my vape kit?
Give the kit a quick wipe daily and a fuller pod or tank clean once a week. You should also clean it properly every time you change a coil or pod. Sub-ohm kits and sweet, dark e-liquids leave more residue behind, so clean those more often to keep the flavour sharp.
Can I rinse my vape pod or tank with water?
Yes, most refillable pods and tanks can be rinsed in warm water, but check the manual first. Take the coil out before you rinse, and never wet the battery or mod. Let every part dry fully before you refill, because leftover water dilutes the flavour and can cause gurgling.
Can you clean a vape coil instead of replacing it?
Not really. Coils are consumables, and rinsing rarely brings the flavour back once the cotton has degraded. Replace the coil as soon as it tastes burnt or muted, and prime every new one with a few drops of e-liquid on the cotton before you fill the tank or pod.
Can you clean a prefilled pod vape kit?
No, sealed prefilled pods should not be opened, rinsed or refilled. What you can clean is the device itself, so wipe the battery contacts and charging port with a dry cloth or cotton bud. When the flavour fades, swap in a fresh pod.
How do I clean the charging port on my vape?
Use a dry cotton bud or a soft brush to lift out fluff and dried residue. Never push metal objects such as pins or paperclips into the port, as they can damage the contacts. If liquid has got inside, leave the device uncharged until the port is completely dry.
Why is my vape leaking after I cleaned it?
The usual culprit is a seal or O-ring that has not seated properly after reassembly. Check that the pod or tank is bone dry, then look over the glass or pod for hairline cracks. If the seals are twisted, flattened or split, replace them or fit a fresh pod or tank.
About the author

The team behind Vape And Eliquid is made up of experienced vapers who test everything we sell. With decades of combined vaping knowledge, there isn't a question we don't know the answer to.
Related guides
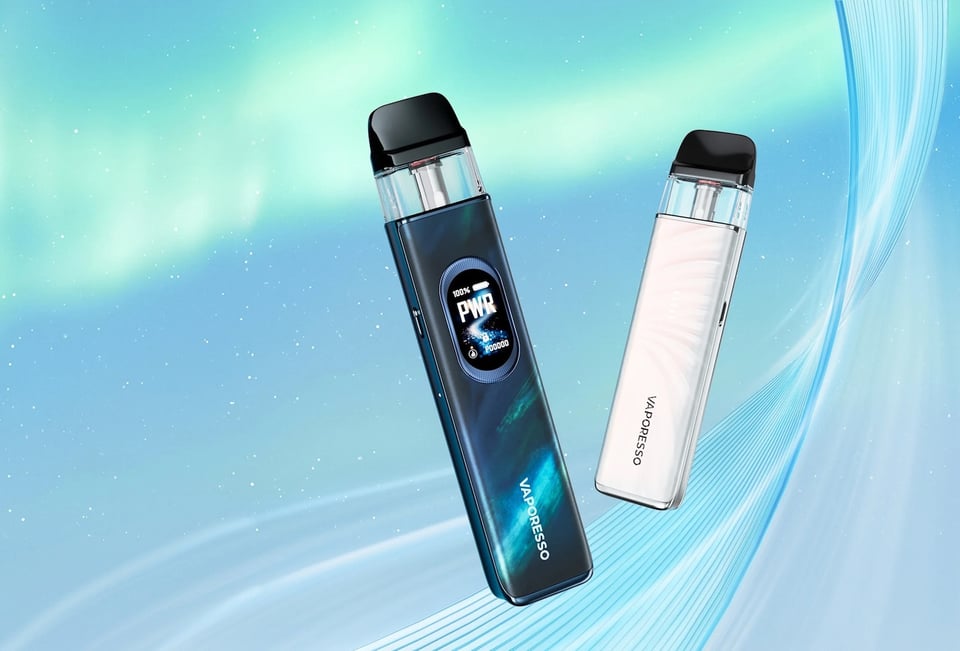
How To Choose Your First Vape Kit
Switching from cigarettes or disposables? We test vapes daily. Here's exactly which first vape kit to buy in 2026, and the features that actually matter.
Vaping vs Smoking: Cost & Health Comparison (2026)
What the NHS says about vaping vs smoking, the real yearly cost of each in the UK now the vape tax is live, and how vapes compare with patches, gum and quit meds.
How to Charge Your First Vape Kit
Learn how to charge your first vape kit safely, including USB-C setup, charge times by mAh, battery light meanings and quick fixes for UK beginners.